You are using an out of date browser. It may not display this or other websites correctly.
You should upgrade or use an alternative browser.
You should upgrade or use an alternative browser.
1084S-P LOPT+HOT replace
- Thread starter SquallStrife
- Start date
- Replies 122
- Views 46641
On your pictures I saw that the 2 plastic clips were also missing from your HR Diemen flyback. I used a zip tie to fixate the flyback.
I hadn't noticed before I did see the other day that one was cracked on the removed original, you're right both of the plastic hooks it has had are broken off... are these second hand items that donberg.ie are selling?
I fitted the scart connector today, but it doesn't work as supposed.
I am testing with a Mega Drive.
On my Mono 1084-P it works perfectly.
On the 1084S-P the monitor is losing sync every now and then and flickers.
Any ideas?
I am testing with a Mega Drive.
On my Mono 1084-P it works perfectly.
On the 1084S-P the monitor is losing sync every now and then and flickers.
Any ideas?
I finally got it working.
In the mono version Scart Pin 20 goes into R406 and from there to C401. TS406 is not present in the mono version.
In the stereo version the connection between R406 and C401 is not given and has to be bridged. But the bridge runs straight
through the mounted TS406.
So, besides my first proposed steps
- close bridge 9289 to connect scart PIN 20 to R406 (mixed sync)
- close bridge 9274 to get switching voltage
- 390 Ohm to R210
- 1k Ohm pulldown to R220
- move white audio cable (R) from scart pins
- put in scart connector
I also had to put
- BC548B transistor to TS405
- 2,2uF 50V capacitor to C401
- 47kOhm resistor to R402
- 39kOhm resistor to R403
- close bridge 9247(?) that runs through mounting position of TS406 and connects R406 and + of C401
Now, it accepts RGB 50/60Hz through the newly fitted scart connector. I can not test if the Analog RGB DIN Input still works.
Last edited:
So, the last imperfection with my unit is the slight rotation of the whole screen (maybe 1-3° clockwise).
Is moving the yoke dangerous? I know I can unplug the yoke from the PCB.
It also seems to be glued to the tube, so what exactly would I have to do?
Is moving the yoke dangerous? I know I can unplug the yoke from the PCB.
It also seems to be glued to the tube, so what exactly would I have to do?
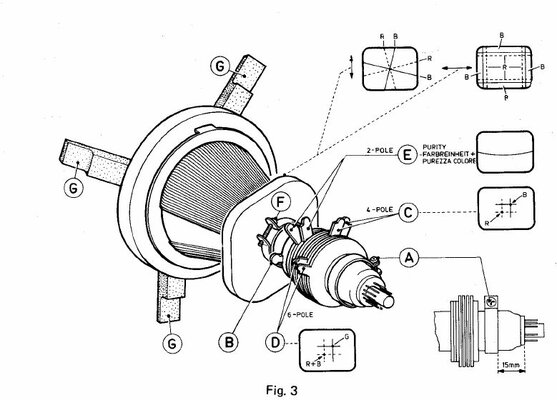
you dont move the tube you move the field coils bud.
the part with the adjuster tabs on,just dont mess with the tabs.
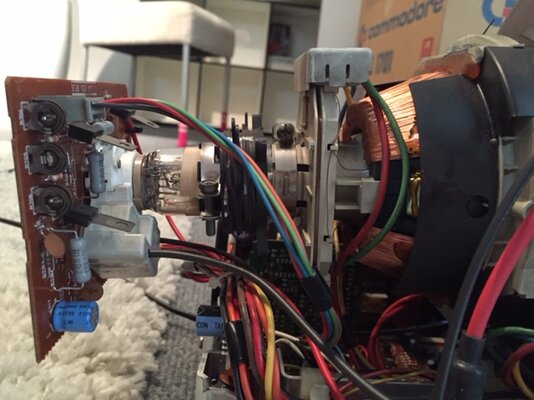
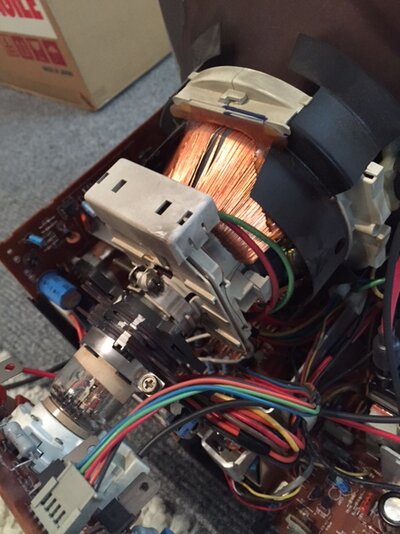
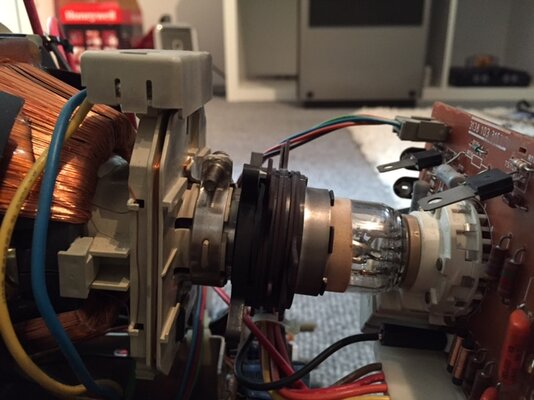
you see the part with a screw that looks very much like a jubilee clip? that...then simply turn it.
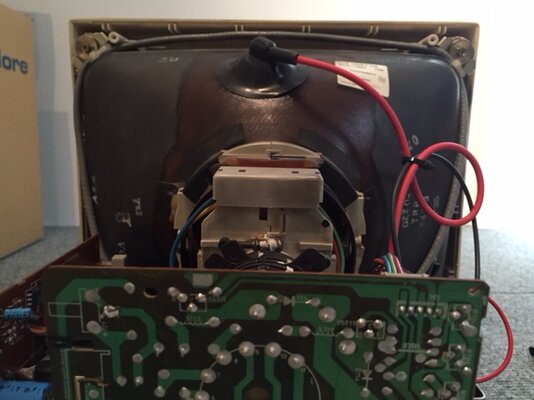
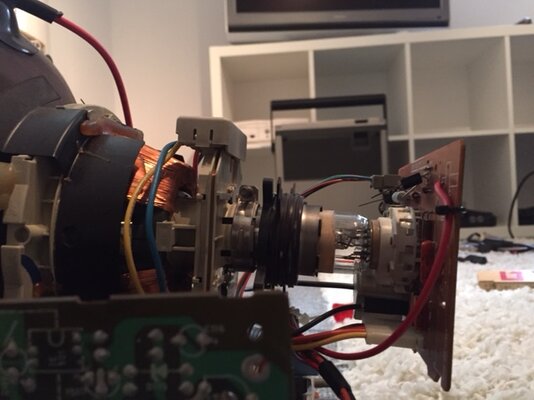
you can see the screw here:behind the tabs...

did i mention,dont mess with the tabs...otherwise youll be in a world of hurt...
the part with the adjuster tabs on,just dont mess with the tabs.
you see the part with a screw that looks very much like a jubilee clip? that...then simply turn it.
you can see the screw here:behind the tabs...
did i mention,dont mess with the tabs...otherwise youll be in a world of hurt...
Last edited:
I believe it's not the screw closest to the connector on the end of the neck but it's the screw closer to the thick end, that holds all the copper wiring - that's the part that needs to be turned to turn the image - IIRC. The outer screw probably holds the adjustment discs, the thick dark brown disc at the other end of this pack with the four handles is what you loosen if you want to "be in a world of hurt". It's quite a pain to adjust those - you can go on forever as it will never be perfect, some area will be less good - always. Seems they are often glued to the glass as well so you may not be able to just twist it after loosening the screw.
Nice image - I'll print that for next time I discover a color bleeding in a corner or similar...
- - - Updated - - -
I got the free replacement flyback from donberg.ie today, packed in a reused box this time as well, some dental hygiene thing, box was filled with shredded office paper - they seem very aware of their packaging costs - quite nice that they save on packing.
Original flyback box was previously opened as last time, holographic sticker cut, three transparent pieces of tape held the lid. Out came a nice object, this time with three polystyrene rectangles around the pins and ferrite. Pins were straight and nice, no damages! Well - those two plastic clips were broken off on this one as well. Maybe the HR7506 model isn't supposed to have those...?
So this is the damaged one I received last time, new one and original, crooked pins, straight ones and one more pin - they saved one ground pin on the HR7506 compared to the original.


I wonder about the ferrite though, it's not glued together straight on this either, not that it matters much, it's not cracked.


It slid right into the holes, no adjustment needed, put a cable tie there as well - as suggested by earlier poster - because of the missing plastic tabs. Cables were a few cm too long so I shortened them to the same length, both soldered to the neck PCB, one (black) under the plastic lid to the tube connector and the other (red) in the corner of the neck PCB. H.O.T. was swapped - I decided to go with the BU* version. HTC on the back, clamped it, adjusted, soldered...
Turned on - wow... Screen was adjusted to maximum, turned off adjusted down Screen, connected the C64 closest to it. I've got picture!
When adjusting the image I noticed the height adjustment was really flickery, have tried turning it back and forth 100 times (literally), isopropyl, electronics cleaner, nothing seemed to help. I measured it with the multimeter and at the usable area the resistance jumps around a lot.
Any good tips on cleaning these? Perhaps there's a new replacement available somewhere? Back of the pot is really oxidized the wiper also looks very dark, surface could be damaged, don't know. I assume the two pots next to it with blue plastic rings instead of a white one doesn't have the same value? I was considering a swap in case I manage to get it into a working area.
So - successful repair!
Cleaning? New part?
Nice image - I'll print that for next time I discover a color bleeding in a corner or similar...
- - - Updated - - -
I got the free replacement flyback from donberg.ie today, packed in a reused box this time as well, some dental hygiene thing, box was filled with shredded office paper - they seem very aware of their packaging costs - quite nice that they save on packing.
Original flyback box was previously opened as last time, holographic sticker cut, three transparent pieces of tape held the lid. Out came a nice object, this time with three polystyrene rectangles around the pins and ferrite. Pins were straight and nice, no damages! Well - those two plastic clips were broken off on this one as well. Maybe the HR7506 model isn't supposed to have those...?
So this is the damaged one I received last time, new one and original, crooked pins, straight ones and one more pin - they saved one ground pin on the HR7506 compared to the original.


I wonder about the ferrite though, it's not glued together straight on this either, not that it matters much, it's not cracked.


It slid right into the holes, no adjustment needed, put a cable tie there as well - as suggested by earlier poster - because of the missing plastic tabs. Cables were a few cm too long so I shortened them to the same length, both soldered to the neck PCB, one (black) under the plastic lid to the tube connector and the other (red) in the corner of the neck PCB. H.O.T. was swapped - I decided to go with the BU* version. HTC on the back, clamped it, adjusted, soldered...
Turned on - wow... Screen was adjusted to maximum, turned off adjusted down Screen, connected the C64 closest to it. I've got picture!
When adjusting the image I noticed the height adjustment was really flickery, have tried turning it back and forth 100 times (literally), isopropyl, electronics cleaner, nothing seemed to help. I measured it with the multimeter and at the usable area the resistance jumps around a lot.
Any good tips on cleaning these? Perhaps there's a new replacement available somewhere? Back of the pot is really oxidized the wiper also looks very dark, surface could be damaged, don't know. I assume the two pots next to it with blue plastic rings instead of a white one doesn't have the same value? I was considering a swap in case I manage to get it into a working area.
So - successful repair!
Cleaning? New part?
Last edited:
Congratulations on the successfull repair!. Sorry, I have no suggestions regarding the height adjustment.
My ferrite looked the same, my pins were bent in order to make it fit. Don't know if these are used, I think the might have been
mounted for test purposes before.
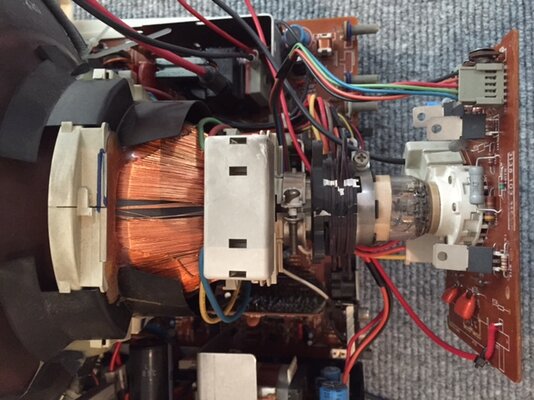
Thanks for your reply regarding the yoke movement. I also think it is screw F. I already tried to move the large part after
losening screw F, but it is glued to the tube.
I got this monitor by mail and the lower left screw that mounts the tube into the case was off, so I had to recenter the tube.
I don't know if the picture was rotated before shipping.
Is your yoke also glued to the back of the tube? And is your picture perfectly alligned horizontally?
So, I fixed the orientation.
I cut the glue on 2 of the 3 "G" legs at the back of the tube.
Then I loosend screw F and turned the yoke counterclockwise.
Now everything is looking perfect.
If anyone ever revisits this threads, feel free to ask along.
I cut the glue on 2 of the 3 "G" legs at the back of the tube.
Then I loosend screw F and turned the yoke counterclockwise.
Now everything is looking perfect.
If anyone ever revisits this threads, feel free to ask along.
I spent more than one hour trying to clean the troublesome height adjustment pot, what usually helps doesn't, in the needed area it jitters, a lot. So I'm looking for a replacement, there's a plain multi-turn trimmer there now which gives a nice stable image in the right size.
The CTS pots with hex hole seems to be gone, this is the closest I found, but only in "hard to buy" places:
CTS 201XR102B
http://www.digikey.com/product-detail/en/201XR102B/201XR102B-ND/98333
It's the same but has no hex hole, a heated up Allen wrench might solve that - or the adjustment pin will get some modding.
I also considered the PT15M from Piher - nowhere to be found with the hex hole in the 15mm size... :-(
Hole is Allen wrench size 2.5mm... I've seen similar ones with 3.1mm hole but 20% smaller in size.

the flybacks mentioned (HRxxxx) originally come from a place in Spain called HRdiemen.
I bought 4 for my 1081 monitors (HR6489). I assume since they manufacture them that their stocks can be replenished easily.
As those guys discovered they don't sell directly to the public, you have to buy from their distributors and their support is also zero.
Have issues with all my monitors. before replacement picture was fine but with squealing (as usual)
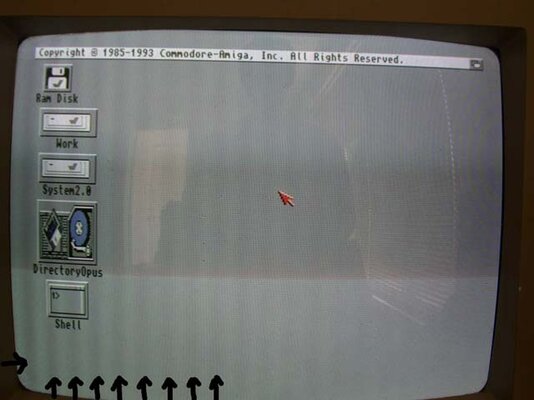
After replacement, no squealing and picture is mostly ok but now has dark jailbars on the left side.
Same fault exactly on 4 monitors so it can't be a monitor issue, has to be flyback related?
But all flybacks are the same so can't be flyback related?
Anyone have any ideas about that and a solution?
Attachments
Last edited:
