Dead A1200 Motherboard

  • Thread starter Thread starter Cluster
  • Start date Start date
  • Replies Replies 16
  • Views Views 2122

Cluster

New member
AmiBayer
Joined
Feb 14, 2009
Posts
275
Country
Lincolnshire, UK
Region
Lincoln
Hi all,

Ok... I have not used my A1200 in a few months,1D.4 motherboard, and it finally gave up last night and I was wondering if this could be fixed by someone?

I plugged the power in and turned it on only to smell what can only be described as a really bad electrical burning smell. I turned this off immediatly, was not on more than 5 seconds, and on opening her up it all looks ok!!! No burn marks no nothing to say that anything was wrong, though I have not taken her out of the tray to see if anything is not right underneath the mobo.
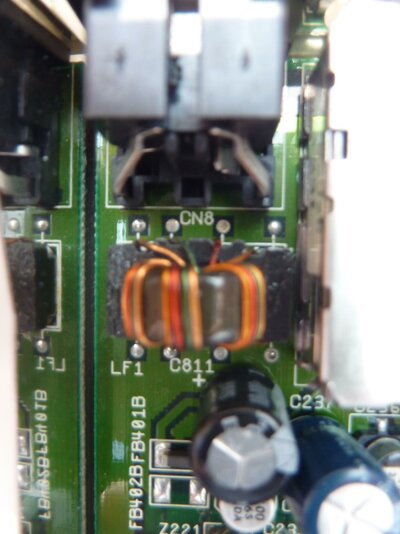
All I can tell you is that there is a small burny smell from the top left of the mobo where the power cord attaches.

After checking everything inside, including unplugging everything non essential, I then plugged her back in and tried again. No further overheating burning smells are noticed but it appears to be dead. No power lights come on... Nothing!


So whats the prognosis doctor! Is she Dead!
 
@cluster

its time to break out the Multimeter

I suspect that +5v has gone south - this may well be part motherboard and PSU so..

test the PSU first for +5v, +12v and -12v, once we have them established we can continue.

Before turning on the power, first inspect C800 (.01uf Capactitor) do you notice any damage or smell eminating from it? if not lets move on; I suspect that the capacitors have died on route to giving the A1200 Power (mainly +5v), these caps are just past LF1 (that donut shaped component right after the input plug).


test the output voltages from LF1: you should be able to trace these from the Plug input connector.


Now we need to test the following by powering up the Amiga.


+12: attach the probe to the (+) positive side of C821 (47uf) and COM (ground)
-12: attach the probe to the (-) negative side of C822 (47uf) and COM (ground)
+5 : attach the probe to the (+) positive side of C811 (1000uf) and COM (ground)
+5 : attach the probe to the (+) positive side of C801 (0.22uf) and COM (ground)
+5 : attach the probe to the (+) positive side of C804 (0.01uf) and COM (ground)

If you don't get back proper voltage reading from the probes, then this will be the source of the problem.
 
Right First things first... Looks like I am jinxed as my multi meter is also not working lol...

I have also tried to take pictures of the board but the lighting is no good at the moment. I will take this into work and get one of the lads to test it and I will report back. I will also take pictures of the board and post them tomorrow.

@Zetro

There is a definate smell comming from around LF1 (Donut shaped component) but there are no visible signs of damage on the top side of the board. I did manage to look underneath and it looks like there is a small burn just between the LF1 & C800 area on one of the tracks. Again I will post some pics tomorrow...

Thanks for now :)
 
@cluster

it sounds as thought the LF1 filter and C800 will need to be replaced =(

the C800 is an easy find, the LF1 filter might be a bit tricky. if its worth owt - C800 is the voltage bias of the +12v and -12v, the C800 is also fed the +5v from the LF1 filter.

I can understand back in the day the need for the Filter Coil however, this does limit the draw from that point onward. Arguably if you were using say a PicoPSU or similar internally then it would best to introduce the power after the LF1 filter

Good luck on getting it repaired, it does sound like an easy fix (touches wood) =)
 
Sorry for the delay... Work and personal life too busy!

Right I have taken some pictures. As you can see this is still a clean and tidy board. The only thing is highlighted in the yellow square on the underneath of the board.

The power supply is being returned to be checked from where I purchased it from so I hopefully will have an answer from them as to its condition, though I know its not right due to the sparking sound it sometimes makes when turned on & sometimes it just does not turn on at all.

I took the board into work for someone to look at it for me but they only did a quick check on the power supply and not the motherboard so unfortunatly I am non the wiser. This unfortunatly leaves me in a predicament as I do not know how to check anything, and my recently purchased multimeter is not working (Not that I have ever used one anyway).

Sorry I cant be much more help on this one

It is not too much of a problem as I have purchased another one, awaiting its delivery, but it would be a shame not to try and get this working for a backup.

Would anyone like to have a look at getting this back up and running for me?
 

Attachments

  • P1000944.jpg
    P1000944.jpg
    169 KB · Views: 8
  • P1000945.jpg
    P1000945.jpg
    177.1 KB · Views: 4
From the second picture I can tell something sucked way too much current from the power supply.

A near-death HD or short-circuited CF may do this kind of problem. Check the IDE header area for burning signals.

The PSU socket trace can be repaired by a simple jumper wire (remember to use a thick wire for this!).
 
@rkauer

Hmmm... I recently installed a cf card which comes out the back of the case. I did insulate this with insullation tape so it should not have shorted out in any way. (The tape was wrapped around the adaptor)

Do you think this could have caused it?

I have also checked the ide area, as per your recomendation, and there is no signs of any burning
 
@Cluster

in you 2nd image (the underneath of the motherboard.. just past LF1 the 5volts has gone directly to ground - this has burnt out a track on the motherboard. The clicking you hear is small electrical discharges making contact with ground.

As rkauer has stated you can bridge the 5V output of the LF1 to the C800 capacitor (0.01UF) I would also suggest replacing this SMD 805 mono ceramic 805 capacitor as well.

Pesonally I wish I had the time to help you, alas I am up to my neck at the moment.. I would suggest / recommend Hikey, D0pefish and TC, they are very competent and I would trust them implicitly for this repair =)
 
As always, I can do it. But please do not expect to get your Amiga back in this lifetime (Doomy style)...

You know: thorough tests, etc.

I still have here the unfinished lateral slot extension for Jurgen... Was about a year ago?
 
@ Zetr0 & rkauer

Thanks for all of your help and guidance. I will definately get it fixed by someone soon, however, I would like the board back before 2012 lol

I will contact some of the people Zetr0 mentioned later on.

Its amazing what comes out of some bad luck... I have now purchased two A1200 mobos and will be starting another project so bang goes some more wages!

Damn... 5 projects on the go and no time to spare. I am addicted or :nuts:

Thanks again
 
I think.... like the rest of us..... you are Crazily Addicted.... as opposed to Addicted Crazily....

or I could be wrong and we are all nuts.... but hey.... better nuts than screws any day... =)

good luck with the repairs, just wish I could of helped more! =D
 
Thanks all for your help. I have managed to fix this by soldering a wire over the damaged area and cutting the track!

Who would have thought that it was that easy! First for me that and I am chuffed to bits :lol:

The solder gods were smiling on me this day :bowdown:

Hmmm now I have three A1200's! What to do with them all now?
 
\o/\O/ !AWESOME! \O/\o/

Another system back from the dead!


well... it would seem Mr Cluster... that you have indeed a Cluster =)


Now, on a serious note, did you change the Capacitor? I wonder because thats a cause of concern, after all there was enough current to use a rather large bit of copper as a fuse wire!
 
Well Thank you Mr Zetro

It was the first time I have ever used a soldering iron so I only soldered a nice thick wire underneath and then tested it for an hour... so not replaced anything else
 
Back
Top Bottom