A1200 crippled audio

  • Thread starter Thread starter BLTCON0
  • Start date Start date
  • Replies Replies 21
  • Views Views 3744

BLTCON0

Math inside
AmiBayer
Joined
May 7, 2011
Posts
2,219
Country
Hellas (Greece)
Region
Chania, Crete
Ok so I'm almost sure this will get me the "caps!" answer but it never hurts to verify :)

The problem: Crippled audio from a A1200 board I've been testing

Observation details: Loaded up Pinball Dreams and right away the sound was crippled, crackling like some paper was torn in the background, similar to what one gets when the "tops" of a waveform go beyond the maximum and are clipped.

Finer observation: This somehow seems to affect only one channel, but in the following way: When e.g. the left channel plays, the sound is crippled as described. But there was a section where sound only came from the right channel, and it sounded absolutely fine. Just as soon as the left channel kicked in though, the volume level on the right channel seemed to sink down to practically zero and of course the sound came out all scratchy and crackling and torn, although here and there bits of clean audio could still be heard among the mess.

Tested:
-12 V on the PSU input is fine
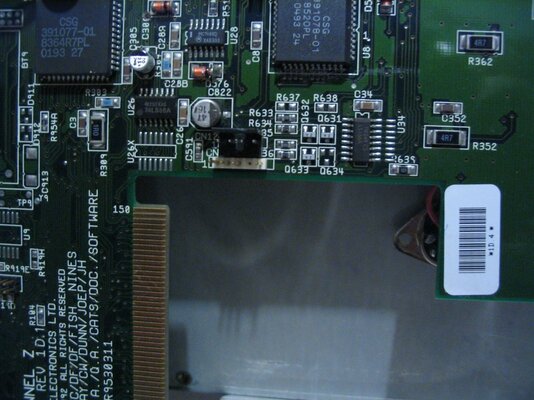
+12 V and -12 V on the middle pins of LF347M measure +12.05 and -11.86 respectively, so they're also fine

Is it still possible that the LF347 chip has gone bananas and what's the best way to verify this?
Or
Should I just replace the 22 uF caps?
Or
Something else I have no idea about?

Thanks!
 
@BLTCON0

its VERY unlikely to be the LF347 unless there has been a very serious sustained spike in the + / - 12v

As you know the likely cause is rthe two 22uf Capacitors that are notorious in dying with exactly the symptoms you describe. As you also know this is a common fault so man up my friend, and get them caps replaced =)
 
Thanks :) I was concerned the +12 and -12 voltages on the LF347 might measure ok yet there could still be damage to the inputs/outputs.

So two more questions:
a) what's the proper tool for those SMT caps? some precision hot-air device? I have only dealt with through-hole ones so far and also the location behind the keyboard connector of one of these isn't very promising for my standard soldering iron.
b) could I solder regular 'legged' ones (e.g. the ones from an A500) for verification and as a short-term solution until I get a proper replacement set or the pads are too tiny to provide adequate mechanical support?

I should also add that initially the board was tested in a tower configuration with an Indivision AGA and a Lyra II adapter installed, and apart from the sound problems it exhibited serious discoloration on the RGB port (it was simultaneously connected to a CRT via the Indy and an LCD TV via RGB-to-SCART). The picture was perfect via the Indy but discolored on the TV. After I removed the board and tested it on its own without the Indy or the Lyra, the discoloration persisted for a while then went away.
The nature of the discoloration was let's say a distortion of colours towards blue-purple-pink shades and strong quantisation of tones. Looked like as though the green element had gone away completely. Any idea on that?
 
Hi there BLTCON0,

you could also check R332 and R334 which are behind the audio sockets and between the two 22uf caps. I had a board that sounded much like yours and it turned out that one of the resistors were broken although they both looked physically ok, they are 1K resistors and in a bad place to get to with a soldering iron ie keyboard connector and audio sockets (lots of plastic to avoid).

I used thru hole caps to replace all the electrolytic capacitors, you just form the legs to an L shape to fit where the old cap was, the only downside is that you wont be able to fit a top shield onto the board (if it actually had one). You could always form the legs so that the cap could lay on its side instead of standing up prior to soldering it in place too (I did on a couple of 1200s).

A hot air station with a small diameter nozzle works fine, if you look on fleabay though, there is a nozzle with 2 holes and is adjustable (one fixed and the other can be moved from 5mm to 10mm distance), that is something that I would have liked when I did mine. A lot of folk have just used pliers and twisted the SMT caps a quarter turn to remove the body and used a soldering iron and tweezers to remove the legs from the board, I have never tried it myself though, maybe worth trying on a duff circuit board to get the hang of it (same for using a hot air station).


I don't know much about your colour problems but I wouldn't be surprised if it was also the caps next to the video chip, it makes good sense to replace all the electrolytic capacitors in one go. If there is any signs of leakage, then clean up the board before removing them.

Zetro recommended using a dishwasher set at 50 degrees (no soap etc) and stopping it before the dry cycle starts to prevent further problems, then stand the board on edge and let it dry off for a couple of hours before removing the caps (this is from memory so it may be slightly wrong).

From what I experienced before knowing about removing the leaked residue, is that it can cause the circuit board to overheat in the area where the residue is and actually burn the board (I was using a hot air station).


It is also important to shield nearby plastic parts form either a soldering iron or the hot air if you go that way, I used metal strips cut from a duff computer CD players case and formed them to fit around the keyboard connector, IDE connector and the Audio connectors plus the power connector for the floppy drive and the PCMCIA slot where another cap is. The shields can always be used again in the future and cost nothing to make.

Realistically, if I didn't already have the thru hole capacitors then I would have definitely gone for this :-

https://www.amibay.com/showthread.php?t=4400

The right parts for the job and I would also recommend a hot air station even a second hand one, they are pretty amazing things to use :thumbsup:
 
Just a thought, you tired wiggling the phon socket. mine did as described, just a loose solder joint in the end
 
When replacing the audio caps, I would suggest using non-polarized caps

Commodore made a mistake in the audio circuit - the audio circuit by its design alternates voltage from -12v to +12v (thus you need atleast a 25v rated component) Using an eletrolytic capacitor in this circuit is elementary wrong by design and will reduce the life span considerably.

You should look at replacing this with a non-polarized / bipolar capacitor

Farnell do stock through-hole 22uf BiPolar (non polarized) 35v Capcitors (35v would be at the top I would want to go as the potential charge would be 35volts @ 22uf which is more than is needed for the circuit.

I would recommend these for those whom have yet to build up skills in the SMD soldering - also its wise to mention that while you might find some on eBay with a good enough look... you may struggle to find a 22uf @ 25volt SMD based bipolar / non-polarized capacitor. (the highest Farnell stock are 16v in the SMD range which is two low.)
 
Last edited:
Thanks people, I've got some homework to do with the extensive info provided here! I'll update as results come by.

JuvUK wins the "most unexpected reply" prize :lol:
 
Update:
The voltages on the left-channel side of LF347 aren't good. As I had no idea what they should be, I measured them against my A1200D (where all pins are +2.46 V at idle) and I get:

Pin12 (AVREF - IN4+): 2.46 V (therefore seems ok)
Pin13 (Paula pin34 - IN4-): 0.27 V (??)
Pin14 (output to Pin3 - OUT4): 11.69 V (??)

(pins 1-3 out of order too, 11.25, 11.25 & 11.65 V, but they're further down in the schematics so could be a result of the above)

On the schematics there's R321 = 1.5 K between Pin13 & Pin14 but the actual resistor is marked 681 aka 680 Ohms, what's with that? Mistake in the schematics?
Anyway it indeed measures 675 Ohms as should on my A1200D, but open loop on the 'bad' board. Also, continuity between pins 13 & 14 and R321's pads is perfect, as is between the adjacent C321 capacitor, so I'm hoping it's just the resistor. Will replace and see.

(see photo) this I totally didn't observe when initially inspecting the board, but only after the measurements indicated something's wrong. The photo is bad, but a 'scratch-type' deformity can be seen on R321, making the 681 marking a bit illegible. R331 (its right-channel twin) looks and measures perfect on the other hand. Sign of burnt resistor?
 
:-D
It was the R321 680 Ohms resistor! Replaced it tonight and the sound is perfect again.
It was cut in half :-o Upon removing some of the solder from one end with wick, that end's half went away.
How much and how fast would it have to overheat to end up like that? :?:

@Allen1 & Zetr0
Thanks a bunch for the eye-openers! :thumbsup:
 
I am pleased that you found the duff component through testing the parts in the circuit, its sometime hard to nail down what has failed but really fantastic when you do :thumbsup:

The resistors I mentioned were the ones that failed on 2 boards I got for spares or repairs, one of the boards had no sound and was sold as such (I got it from here) the other one had leaking caps too and noisy distorted sound very much as you described in your initial post and it was due to one of those resistors I mentioned being duff.

I think the resistors crack in half due to the board flexing or too much power going or being drawn through them and eventually fail as yours did and the ones I mentioned and as you have found out, they don't always look like they are broken :D

All the best,

Allen.
 
this is the third time its been resistors as the primary culprit - seems a 3 in 10 chance at the moment lol!

Congrats on finding and solving the issue :thumbsup:


I am inclined to agree with Alen1 - this could likely be a factory fault that effects some motherboards over time and or perhaps the motherboard being flexed??

Eitherway its pretty rare an SMD resistor fractures in such a place.


Its good to add another potential fix to the big book (tome) of Amiga repair.
 
@Zetr0
With this avatar you can well pass as the "holy keeper" of that book/tome :-P
Do you stick to multimetres, PCB cleaners and soldering irons for your repairs, or you have some Amiga spells to make stuff work too? :roll:
I can already visualise "expellifungus", "tabula reparo" and "floppydiscious" :-P

By "being flexed" you mean the board getting bent? i.e. from "|" going to "(" ? Or you're talking about expansion/contraction?
I had some wild thoughts related to different expansion patterns [recall there was an Indy AGA and a Lyra2 there, all under a Mediator 1200 TX, so heat was rather high as I found out] pulling the resistor apart, but the more I think of it the less sense it makes.
 
@Zetr0
With this avatar you can well pass as the "holy keeper" of that book/tome :-P
Do you stick to multimetres, PCB cleaners and soldering irons for your repairs, or you have some Amiga spells to make stuff work too? :roll:
I can already visualise "expellifungus", "tabula reparo" and "floppydiscious" :-P

LOL there are some repairs that have come through my workshop where a magic spell was the only thing that would of saved them... lol

I had a washing machine PCB (module) and lets just say 13amps at 220 volts is enough to sumble even dumbledore!


By "being flexed" you mean the board getting bent? i.e. from "|" going to "(" ? Or you're talking about expansion/contraction?
I had some wild thoughts related to different expansion patterns [recall there was an Indy AGA and a Lyra2 there, all under a Mediator 1200 TX, so heat was rather high as I found out] pulling the resistor apart, but the more I think of it the less sense it makes.

yes... pretty much, even a subtle flex with enough heat would be enough to fracture them, there only graphite (carbon) at the end of the day...

with a larger solder bead there solder allows a little flex, but with small amounts of solder - like the skimm they get from the factory is enough to grip them inplace, but not enough for them to flex... in this I suspect its likely to be certain boards in certain situations.

I have to admit it is uncommon, I have only read of 4 cases in the last 10 years to my mind... and three of them Allen1 has been plauged with.
 
:wooha: @ 13A/220V :run:

I see, so I wasn't that wild after all. I guess I'll then have to provide some extra cooling in-between I suppose, especially considering a Voodoo3 is also going in there (those things run hot!).

Another thing I just noticed: This board is somewhat unusual. It has a rev 1D.1 PCB, 9252 date, but has a sticker that says 1D.4. The long wire-bridge found in 1D.1 but not found on 1D.4 boards is there, so I'm not sure what to make of the sticker.
It looks like that's the way the board left the factory. I'll check for the actual modifications as documented in BBOAH, but is this 'hybrid' a known case?
 
Take some Pics

mainly because I like Pics =D

there were a few boards that have not been officially recorded, and their various subtle difference may make all the difference..

1D4's. 1D.1's and 2B's are quite known, but 1B's, 1D2's and 1D3's are not... if anyone has one of these boards some Super Hires photo's would be nice to archive purposing =)
 
1D4's. 1D.1's and 2B's are quite known, but 1B's, 1D2's and 1D3's are not... if anyone has one of these boards some Super Hires photo's would be nice to archive purposing =)

Here you go - four 6 megapixel images covering the area of my A1200 1B mobo. http://npandd.co.uk/A1200_1B

Funny how you can sometimes spot things in photos that you don't notice looking at it normally - like how dusty it is! Also that patch wire on a chip near the composite out socket - any idea what that's for? (No idea if that was done by the previous owner or if it was shipped like that.)
 
@Zetr0
Photos as requested :p. My hybrid must be more of an 1D.1, it doesn't have the XC1 capacitor installed like all 'proper' 1D.4s I've seen. It has a 22-pin clockport though, while I've seen a 1D.1 photo with a 40-pin clockport, exactly like the 1B. Yet here's another 1D.1 photo which could well have been my own (even same 9252 date), but the sticker reads 1D.1 here. Go figure.

The schematics even mention an 1C revision somewhere! And I'm pretty sure someone here has a 1D.2 board (TheCorfiot?) I think I saw a photo of the "1D.2" silkscreening in a thread.

EDIT: Replaced separate silkscreen & sticker photos with one that spans both spots.


@robinsonb5
The wire mod is by Commodore, see here. It's a bit fuzzy but you can see the same brown wire. You can also see a budgie wire-fix which isn't present in your 1B, also not present on yours is the XU1 IC. 1B is uncommon, yours is even more :p

Also the broken resistor R321 that puzzled me because on my boards (1D.1 & 1D.4) it was an 681 (680 Ohm) while in the schematics it was mentioned as 1.5 K... it's indeed an 152 (1500 Ohm) on yours! That kind of un-puzzles me. Of course why they changed it on later revs is beyond me.
 

Attachments

  • rev1D1rev1D4.jpg
    rev1D1rev1D4.jpg
    193.5 KB · Views: 1
Last edited:
The wire mod is by Commodore, see here.

Ah - that's interesting - I wondered if it were the previous owner's handiwork!

You can also see a budgie wire-fix which isn't present in your 1B, also not present on yours is the XU1 IC.

LOL - so what does XU1 do?

1B is uncommon, yours is even more :p

Hehe, trust me to be out of the ordinary.

Also the broken resistor R321 that puzzled me because on my boards (1D.1 & 1D.4) it was an 681 (680 Ohm) while in the schematics it was mentioned as 1.5 K... it's indeed an 152 (1500 Ohm) on yours! That kind of un-puzzles me. Of course why they changed it on later revs is beyond me.

Maybe its actual value isn't critical and they had a glut of 681s? :lol:
 
Back
Top Bottom