A2000 keyboard...

  • Thread starter Thread starter Amstrad
  • Start date Start date
  • Replies Replies 19
  • Views Views 2589

Amstrad

New member
AmiBayer
Banned
Joined
May 21, 2012
Posts
91
Country
Slovenjia
Region
LJ
Hello guys and gals,

Today I was trying to test an newly aquired A2000 keyboard.
Sadly 8 I K , and 2 from the numeric keypad does not responding.
Any ideas ???:(

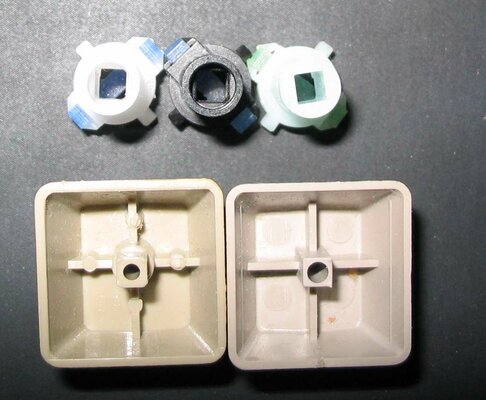
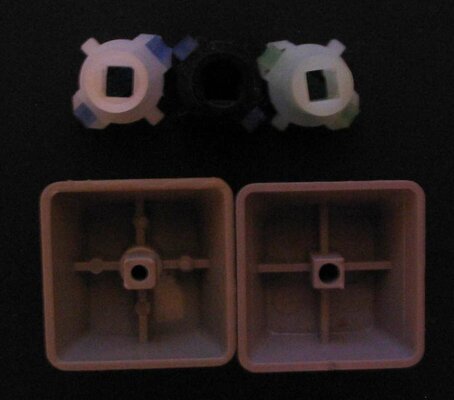
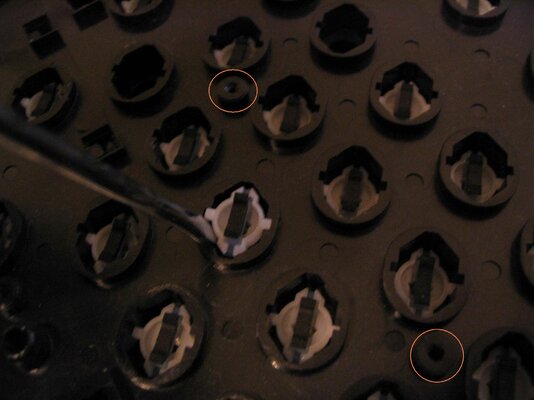
It is an older one with PCB instead of membrane...

Thank you :help:
 
Hi

I had an amiga 2000 keyboard with the same problem with many keys.
I have solved with silver conductive paint that i put on the rubber under the keys and on the pitch in the pcb.
This only with the keys that not responde.
Or maybe only need to clean.
I hope this is usefull for you

Massimo
 
8, I and K is a vertical row. Check the traces, as you have a broken one somewhere. Easy to repair using a small thin wire and solder when you spot it.

The numeric "2" might be repaired using the way Massimo_It told you.
 
@Amstrad
As rkauer suggested, it seems to be a column problem.
Key "2" on the numpad also belongs to the same column! So it makes it even more likely to be a column problem.
(Column #6: numpad "2", "<" , "K", "I", "8" and F6 <-- based on the US/UK keymap))
 
Guys you are great :thumbsup:

Also "," is not working too...
So you think that is an easy or a difficult fix ?
As you can see I am very skilled on this kind of repairs :)

Thank you
 
"," = "<" :)
Check that F6 is dead too.
(use Notepad from WB 1.3 - F-keys should output a ~ there IIRC).
If so, the complete column is dead.
This could mean a tracking problem to input pin PC.6 on the MPU, or even that the pin is badly soldered. I don't remember off the hat which MPU pin corresponds to PC.6 but you can easily find it following the trace from the affected column. Check for continuity and reflux the pin. If it turns out that PC.6 is internally dead, replace the MPU with one stolen from an A500 keyboard, they're the same chip :)
 
One more question please :

The upper side of an A500+ keyboard can be used in a A2000 ?
 
(I have assumed so far that the A2000 keyboard is the Mitsumi variant).

The back plastic base is slightly different so keep the one in the A2000 keyboard.
You can replace the keys AND their underlying accepting sleeves however, they're perfectly compatible.
You must replace the sleeves too because they're hollowed in a different way than in the A500 keyboard (of course the anchors under the keys are also shaped differently to match).
A2000 = square cut all the way
A500 = halfway square cut and halfway round cut
You can keep the rubber cones or replace them with the springs from the A500 keyboard, according to your preferred typing feeling.
The SPACE key is identical to the A500 one, so no need to replace that. That's the reason it's the only key that goes yellow in genuine A2000 keyboards :P
 
Yes forgot to mention it is Mitsumi brand...
OK got it you can use only the keys along with their sleeves.
How can I remove the keys safely ?
 
You will have to unscrew 27 tiny screws for each keyboard :) These hold the plastic base into place against the metal frame. Save them carefully, it's actually a good idea to lay them out so you can remember which hole each one came from.

You can either pop the keys out in advance or deal with them once you've separated the plastic base (that way you have the option of exercising force to the sleeves instead of the keys).

If when you're screwing it back some holes feel tighter, you're using a screw from another hole, hence my suggestion above.
 
hold the key from above between two figers then pry it off with a flat blade screwdriver,make sure to not let the key bend on the stem while removing it.
 
Some photos to sum it all up:
1 & 2: The two types of sleeves (leftmost/middle = A500+/A500, they're the same) & keys
3: The larger blade is preferred for roy_bates' suggestion...
4: ...to help avoid this
5,6,7: roy_bates' suggestion (my preferred way too). Help the key up with your fingers while slowly levering it up with the screwdriver, stop once you feel it loose.
8: Another approach (small blade here). Two of the 27 screwholes can also be seen.
 

Attachments

  • Various01.JPG
    Various01.JPG
    73.1 KB · Views: 4
  • Various02.JPG
    Various02.JPG
    33.7 KB · Views: 1
  • Tools.jpg
    Tools.jpg
    193.9 KB · Views: 1
  • Broken.JPG
    Broken.JPG
    21.5 KB · Views: 4
  • Grasp.JPG
    Grasp.JPG
    149 KB · Views: 2
  • LeverUp.jpg
    LeverUp.jpg
    193.4 KB · Views: 1
  • Removed.jpg
    Removed.jpg
    196.3 KB · Views: 3
  • OptionTwo.JPG
    OptionTwo.JPG
    141.9 KB · Views: 3
Cleaning poor contacts in CBM keyboards

Cleaning poor contacts in CBM keyboards

Just in case you ever need to clean the contacts in these keyboards, here is what I learned from Transactor Magazine in the early '80s: disassemble the keyboard down to PCB with rubber contacts, use a large rubber eraser and rub hard all the pads, wipe away residue with isopropyl alcohol. Reassemble
 
Last edited:
yes but you have to make sure its a pen eraser and not a pencil one,the pencil one is an oil based eraser and wont work.(for the most part you can tell by the colour the pen ones are dark grey)
also youll have to make sure you dont press too hard there abrasive.

thats what i found personaly anyway.
 
I've rehabbed two C64's, a CBM 8032 and two A2000 keyboards with a pink eraser; your "oil based theory"
Is perhaps why they recommended Iso-PrOH to use status post rubbing
 
Last edited:
I've rehabbed two C64's, a CBM 8043 and two A2000 keyboards with a pink eraser; your "oil based theory"
Is perhaps why they recommended Iso-PrOH to use status post rubbing


yes,probably:)
 
Thank you all for your excellent help.
I will try the eraser method first...
 
Off Topic: Key cap removal tool

Off Topic: Key cap removal tool

As a side note, I copied a key cap removal tool I still use today using two paper clips: completely straighten both, then bend in the middle to form "U" shape with equal ends; with a good pair of small pliers, bend both ends into 2 equally sized small hooks (going the same direction). Do both pieces the same way as on will go on either side of the key cap. Using both pieces, You should be able to place one on either side and by pulling upward place equal pressure on each of the four corners on the key cap and pop it off without any damage to the underside of the cap. This is safe enough to remove caps for just cleaning crap out underneath
 
Back
Top Bottom