I know, it isn't always as easy as "on TV"
")
So, in your case step 1 is not really necessary, unless you have doubts about the RPi. If you use the Raspberry foundation's imager tool, and click the cogwheel icon, you can set it up for headless operation before creating the image on your PC.
Step 2 could have been avoided if you read the preconditions on the imager tools info screen
")
Steps 3-5 are a consequence of Murphys Law.
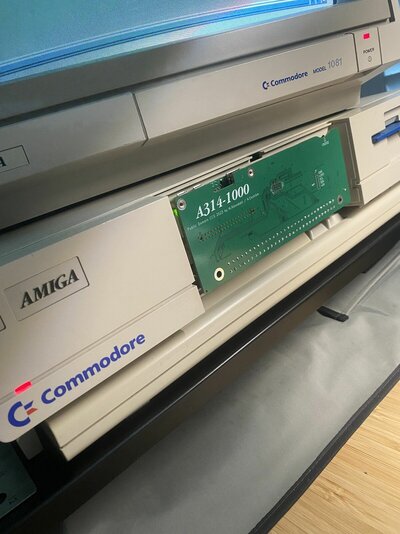
In the newer A314s, like the -1000 and -cp, there is no longer need to adjust further parameters on the RPi, because it now uses a parallel connection to the FPGA instead of SPI. This also has the positive side effect that the whole design is less sensitive to poor power conditions in the Amiga.
For those who haven't yet completed their set-up, I would recommend using high quality SD cards; preferably the "high endurance" types. If you're planning on using your Amiga a lot, then there's the
SLC industrial grade cards, that have much higher re-write counts, compared to the more common MLC type. They also cost an arm and a leg.

Edit: Actually, the SanDisk SDSDQED-008G-XI, "only" amounts to apx $20, which is one tenth of what these cards used to cost not too long ago.
")