Apple MAC LC PSU issue

  • Thread starter Thread starter Jazzmarazz
  • Start date Start date
  • Replies Replies 23
  • Views Views 499

Jazzmarazz

New member
Joined
Nov 7, 2011
Posts
240
Country
United States
Region
Michigan
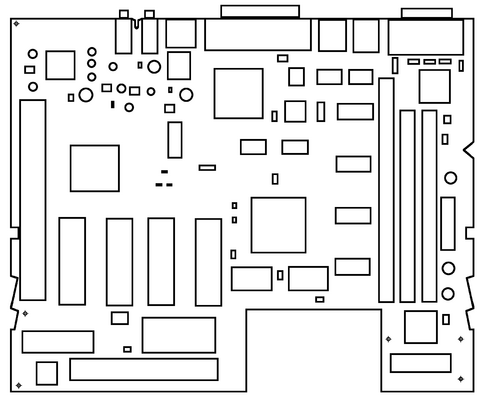
Just got home with my MAC LC from craigslist and am more than happy to have found an APPLE ][e card installed! Monitor, keyboard and mouse all in decent condition with only a little wear on the mouse cable.

My problem is that it does not boot. After flipping the switch, nothing comes on the screen none of the discs spin up. All I get is a clicking noise from the power supply itself. This noise will be quickly paced while power is applied and slowly dwindle to a slower pulse rate until it is extinguished completely.

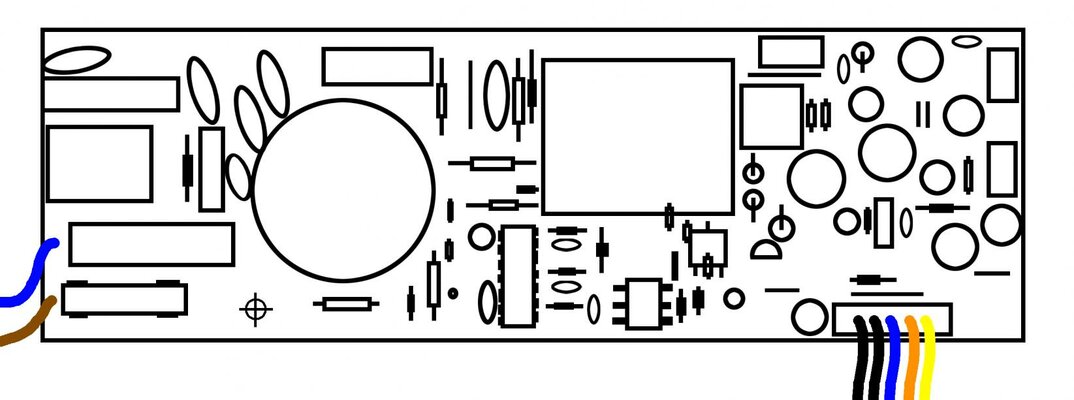
Because of these facts, I assume the PSU is at fault. Before I go and replace all of the caps and r3ecognizeable IC's, are there any common failures related to LC's that I should look for first? I should also note that the voltage ratings from the PSU connector are 0.5v, 0.7v and -.05v respectively. According to the web and bottom side of the PSU, these should be 5v, 12v and -5v.

Cheers
 
Not good.

If you have some electronic skills you can open the PSU and replace the capacitors.

While you are at it, replace all electrolytic capacitors on the main board, too. Those are from the very same era of dreaded Amiga SMD era and prone to leak.

After the recapping you must replace the ½AA 3.6V battery as this particular model series will not boot at all without it.
 
Yes, loads of skill. ;)
The PSU seems to have all through-hole caps, but none seemed to be popped or bloated. The mainboard has several small surface mounted caps which I oh so hate. The only flaw I noticed was a possibly-leaking cap on the Apple ][e card (reason number one why I wanted the thing so badly)!
As for the "½AA 3.6V battery" it looks just fine, but if I find a replacement I would be more than happy to buy it. Do you have any more information on these batts like: lithium/cadmium/alkaline, etc or a reasonable price? I found a lithium type for 3.65 USD online.

Since posting, a new problem has come to light. The mouse is more worn than I had first noticed. The exposed blue wire was split and grounded so I just cut the cable off to fix later on. Maybe I'll locate my arduino and figure out how to make it wireless. :p
 
Bad news. Apperently I was mistaken on the condition of the caps on my mainboard. Under the PSD slot, many of the caps may have leaked and have done some damage. I will document the repair and post pics after work today, but that still doesn't help with the power problem. :blased:
 
The problem can be just those leaked capacitors under the PDS board. One or two could caused a short and that's why the PSU don't release normal voltages.

As I said, those pesky SMD capacitors are prone to leak and in the LC they leak like a pro!

Mine was exactly the same when I received it.
 
Now that you mention it...I measured the power supply outside of its ordinary load after removing it entirely. May that be the factor for the voltages being too small?

EDIT: Thanks for checking back once in a while, rkauer.
 
No need to thanks, mate.

If you can, unplug the PSU from the motherboard then put a small load (say, a pair of 21W car bulbs) on each rail and power it up to check the voltages.
 
Well, turns out my soldering equipment is all in my other apartment. We moved out and have yet to bring over the rest. Sunday it is.
 
Good luck with your task.

Don't forget to tell how it was.
 
TDK branded power supply? If so, this will be of some help: http://68kmla.org/forums/viewtopic.php?f=9&t=19978

Ha! That's great. Mouser links and everything.
My power supply looks perfect so I wouldn't know where to start replacing. This certainly helps.

@rk, I will be sharing pics of the main board as I remove components and perform the repairs. We just have to wait until Sunday...
 
Just don't do as people there did.

If a capacitor is declared as 25V, don't use a 16V part. The same for the value: if original is (say) 63uF, don't use a 47uF instead.

Original power supply may have a tolerance for ageing/drying capacitance value (that's why a 47uF works where a 63uF is required), but in the long (or even short) term the PSU will start to acting up again.
I would never dream of it! Here is the damage that I can see. Traces seem fine, but pins and other contacts have been eaten up, especially on the LM3080. It is an old component so may or may not be difficult to replace. luckily, the Apple proprietary chip is fine. I have since cleaned up the residue.

More pics after removal and proper documentation of each cap's values.


EDIT:

Drew up a quick diagram of the board layout and recorded all top-side capacitor values. My board is marked:
"APPLE COMPUTER INC.
AP1455-03 © 1990
630-⌀3⌀9 - "

C1: Electro: 10uF/16v
C2: Tantalum: 3.3uF/16v
C3: Electro:10uF/16v
C4: Electro: 47uF/16v
C5: Electro: 10uF/16v
C6: Electro: 10uF/16v
C7: Electro: 10uF/16v
C8: Electro: 100uF/6v
C9: Electro: 47uF/16v
C10: Tantalum: 3.3uF/16v
C11: Tantalum: 3.3uF/16v
C12: Tantalum: 3.3uF/16v
C13: Electro: 47uF/16v
C14: Electro: 47uF/16v
C15: Electro: 47uF/16v
C16: Tantalum: 3.3uF/16v
C17: Tantalum: 3.3uF/16v
C18: Ceramic: Bottom Side of Board
C19: Tantalum: 3.3uF/16v
...
...
...
C100: Electro: 1uF/50v
...
C105: Electro: 10uF/16v
...
C108: Electro: 10uF/16v
...
C111: Electro: 10uF/16v
...
...
...
C890: Tantalum: 3.3uF/16v

And as for my Apple ][e Card:


C1: Electro: 22uF/35v
C2: Electro: 22uF/35v

TDK Power Supply:
...
C5: Electro: 180uF/385v
C8: Electro: 8.2uF/50v
...
C51: Electro: 1000uF/10v
C52: Electro: 1000uF/10v
C53: Electro: 270uF/25v
C54: Electro: 270uF/25v
C55: Electro: 1000uF/10v
C56: Electro: 56uF/25v
...
C60: Electro: 47uF/25v
...
C64: Electro: 270uF/10v

...
...
 

Attachments

  • maclcboardlayout.png
    maclcboardlayout.png
    25.7 KB · Views: 2
  • TDK PSU diagram.jpg
    TDK PSU diagram.jpg
    90.1 KB · Views: 4
  • apple2ecardlayout.png
    apple2ecardlayout.png
    9.9 KB · Views: 4
Last edited:
As you can see from my edits to the post above, I have been working on this.
I still don't have my soldering iron, but I don't have the replacement components yet. :p

Anyhow I now have a massive mouser cart with (nearly) every capacitor value that I need for the motherboard, Apple ][e card and power supply. I also located a "male D-sub 26-pin 3-row connector" with shell and a "male d-sub 9-pin 2-row connector" with shell. With these, I will fashion a joystick adapter cable for the apple ][e card. :lol:

Since I don't have an Apple ][ floppy drive, I will have to figure out how to use the hard drive or 3.5" Floppy drive for this purpose.

I skipped two capacitors because the values were not available. These caps are only in the power supply: C5 and C8 as listed above. Aside from these two, which are not listed as problem-caps in the link provided by NJRoadFan, I will replace EVERY electrolytic capacitor. Why not, amirite? :cool:

The caps I chose are mostly Nichicon brand which NJ's link praises and so does the "bad-caps" Forum. The other few are Panasonic brand which was also praised.
 
You can't miss with Nichicon & Panasonic brands.

The 180uF x385V can be replaced by a 180uF x400V available in pretty much every ATX power supply ever made.

The 8.2uF x50 can be replaced by a 100V part and will be the same size or even smaller.

Avoid cheap capacitors like the plague, do a lemon juice bath in the affected areas, then tap water, then soapy warm water, then tap water, then IPA to expel any water, then two or three days to let the board dry out.

The corroded LM3080 is not just an operational amplifier: it is a sensible part and used by the CPU as part of the internal clock and timings.
 
The corroded LM3080 is not just an operational amplifier: it is a sensible part and used by the CPU as part of the internal clock and timings.

That is important news! I assumed it was just an op-amp for the audio output because it is next to the audio. :o

Thank you for that. I will also add the other values for C5 and C8 to my cart.

EDIT:

I placed my order but did not add C5 and C8 because there were no 8.2/100v and the 180/400v were around 6USD a piece. We will see what happens in a matter of time. :)
 
Last edited:
This afternoon, I prepped all of the boards for my new parts. I hope they will arrive tomorrow since I paid for priority shipping. All of the afflicted components have been removed and the boards have been cleaned and fresh solder blobs have been applied to each of the pads. Have a look:


Above, you can see the caps having been removed, revealing much goo. Then I cleaned it. Many of the caps are also gooey and crusted.

Three caps beside the RAM sockets all removed and clean.

Partial way through and complete. Here is all that I removed from the motherboard. I believe that the LM3080 is perfectly fine! All of the legs cleaned up and are now coated in nothing but shiny solder.

Sadly my Apple IIe card lost a pad, but in my defense, it was the first SMT cap I removed.

Looking back on the experience, one pad lost out of a hundred is a success! I will simply have to wire the second leg to the bottom ground plane like it was originally.
 
Very nicely done! After the cleaning the board looks pristine!
 
Thanks!

Today all of my ordered parts arrived but half of the SMT caps are not labelled on the cap, only on the outside of the bag. I will not mix them up, but it still bugs me. :whistle:
In any case, I have two job interviews today (maybe three if you count phone-interviews) so I sure hope I get to replace a few of them this evening. I made one mistake in ordering though...my D-sub9 connector has no pins. I forgot to order them. :oops: HOWEVER, have a look here:

The 26 pin connector fits like a glove! :lol:


I sure love new toys! I will update once more when I finish something. hopefully I get to the PSU at least (remember, the FIRST problem). :p
 
Back
Top Bottom