My Amiga 4000 Project

  • Thread starter Thread starter edd_jedi
  • Start date Start date
  • Replies Replies 75
  • Views Views 3632
Status
Not open for further replies.
I had today off work and as it looked like being a sunny day, I decided to go ahead and give my A4000 a much needed retrobrite.

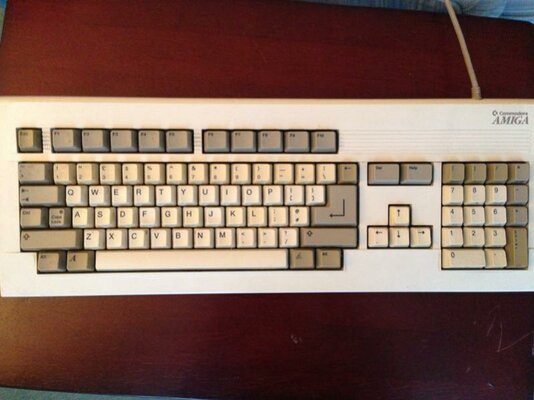
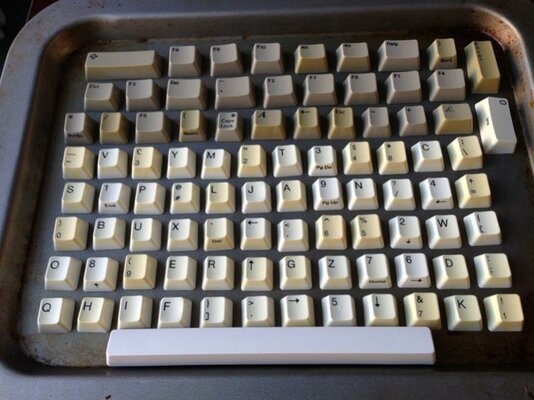
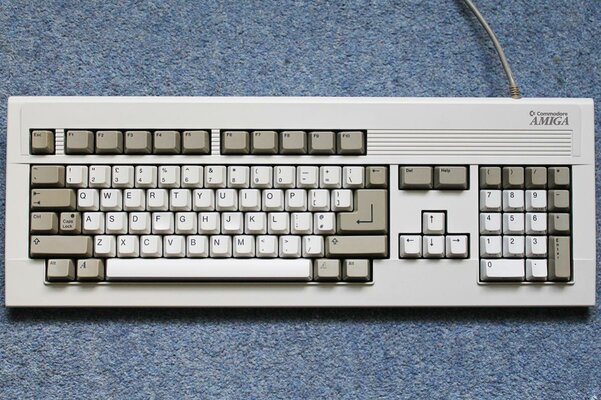
I started at 9am, and decided just to do the front fascia and floppy drive today as taking the keyboard apart is a job on its own. I just used Be Blonde straight from the bottle, and put it outside my window.

Typically although there was glorious sunshine when I put it out, it clouded over within half an hour so I wasn't convinced it was going to work. But 5 hours later at 2pm, the job was done :)

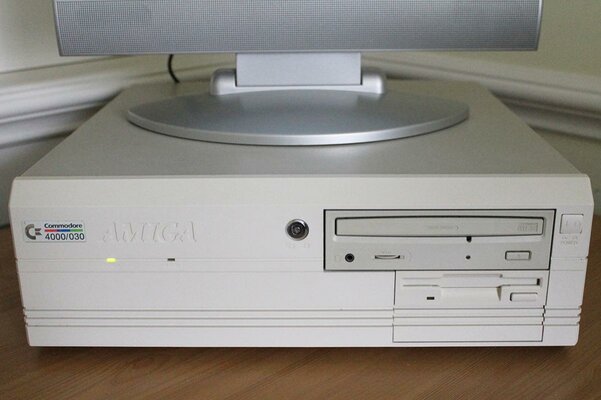
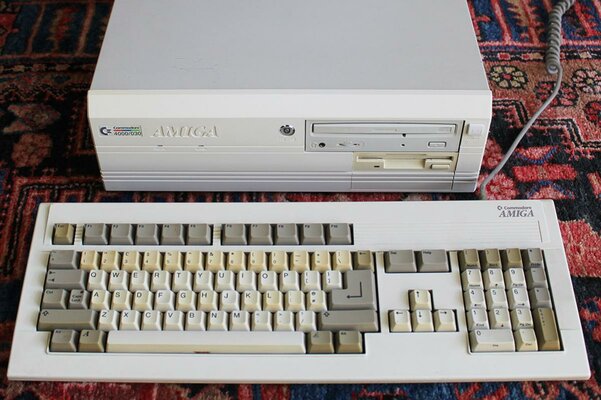
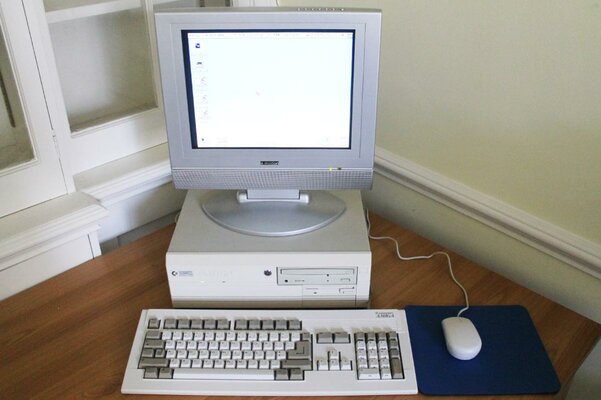
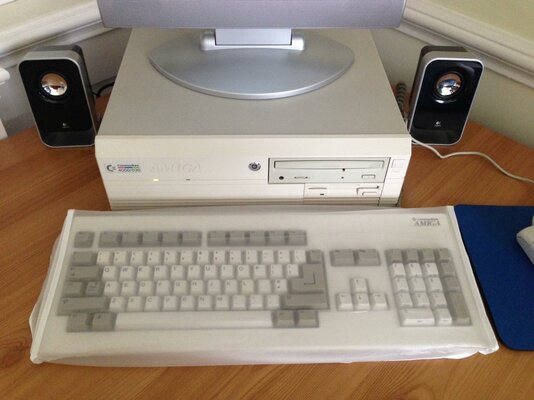
The before and after photos speak for themselves, well worth it. Note how before the CD-Rom was lighter than anything else, and now it's the darkest part.
 

Attachments

  • retrobrite-before.jpg
    retrobrite-before.jpg
    55.8 KB · Views: 5
  • retrobrite-after.jpg
    retrobrite-after.jpg
    89.3 KB · Views: 7
Thanks :) My keyboard is in serious need of it, some of the keys are bright yellow and it really brings down the appearance of the whole setup. Just not looking forward to having to take all the keys off!
 
the keys can be a pain sometimes,but well worth the hassle go for it:thumbsup:
 
Nice retrobright job :thumbsup:, that reminds me that I've something to do about my own A4000, I know I will..., maybe some day... (insert any excuses for laziness here).

---------- Post added at 17:35 ---------- Previous post was at 17:18 ----------

One doubt, for the floppy drive did you have done it with the flap attached or have you taken it out ?
 
One doubt, for the floppy drive did you have done it with the flap attached or have you taken it out ?

Yes the fascia/flap/button of the floppy drive all clip off easily enough. Definitely essential to do it properly. There was a massive amount of dust behind the facia too which was good to get rid of!
 
Yes the fascia/flap/button of the floppy drive all clip off easily enough. Definitely essential to do it properly. There was a massive amount of dust behind the facia too which was good to get rid of!

Yep I told you because I know from my own experience that the flap's hinge pins are very delicate. :roll:

But Nothing that anyone can't solve by cutting a needle's spike and then heating it to insert it on the flap side, resulting a perfect hinge pin substitute . :lol:
 
Following my A4000 retrobrite session last week, it's time to sort out that gross keyboard!

As you can see in photo 1, it is not only really dirty but also has uneven yellowing, and it just looks dreadful. The first job was to take it all apart, many people seem to retro brite keyboards fully assembled but due to the cleaning necessary I wanted to do it properly. You can see why in photo 2 - check out the dust! :blink:

I have seen many methods mentioned including putting all the keys in a glass with watered down solution, but due to the success of my fascia I opted to follow the same procedure. I blu tacked all of the keys on to a baking tray so that they are positioned for painting. I also did the space bar yesterday as a test, and in photo 3 you can see how white it now is compared to the rest of the keys.

The full set will be going out tomorrow, I will post up the results then :)
 

Attachments

  • keyboard1.jpg
    keyboard1.jpg
    51.2 KB · Views: 9
  • keyboard2.jpg
    keyboard2.jpg
    66.7 KB · Views: 5
  • keyboard3.jpg
    keyboard3.jpg
    64 KB · Views: 8
if you dont have much luck doing it the way you are,then get a bottle of 35% h202 and put them all in a tub in the sun they come out great.(dont dilute it use it neat)

putting them back on can be a bit of a pain but worth it,just be carefull as the clips on the keyboad can break.:)
 
All done, here's before and after photos, plus a photo of my setup now that it's all nice and white. I'm so pleased with the keyboard, it looks like new. If you haven't done this yet, do it!
 

Attachments

  • keyboard-before.jpg
    keyboard-before.jpg
    120 KB · Views: 7
  • keyboard-after.jpg
    keyboard-after.jpg
    175.4 KB · Views: 4
  • a4000-retrobrite.jpg
    a4000-retrobrite.jpg
    88.4 KB · Views: 8
Looks awesome mate, well done :thumbsup:

My advice, keep it covered up - it can go back yellow faster if it was retr0brighted.

Very good results though - kudos :)
 
My advice, keep it covered up - it can go back yellow faster if it was retr0brighted.

It will slowly go back to the previous state after retrobrighting since the treatment only work on the top layer while the original yellowing extends further into the plastic, but I don't think it will quickly become more yellow than it was before the treatment. If it starts to look yellow again in a couple of years, just give it another treatment. :)

Surely is a nice looking result, and I'm looking forward to getting some sun here again, so I can begin treating my extremely yellowed A500.
 
Thanks guys. Yes hopefully it doesn't start to go yellow again too soon, but if I have to do it every couple of years that's not the end of the world. It was worth pulling the keyboard apart just to give it a proper clean. A dust cover is definitely going to be ordered!
 
if you was up to the task,you could make a hard cover from clear perspex.

well,thats if you wanted a hard keyboard cover:lol:
 
I remember that you used to be able to buy hard plastic keyboard dust covers. Was there ever one for this style Amiga keyboard?

That reminds me, one thing I noticed when I took it all apart is that the top case was labelled as an A3000 part, and the bottom case A2000. Does that mean they just re-used whatever parts were lying around, assuming the keyboard cases were all the same even if the electronics weren't?
 
i dont know edd,i did have a a3000 keyboard that looks just like the 4000 one.

and the keybaords do work on other amigas.

yes,i think there was a compant that used to make hard covers for keyboards(some were smoked effect)
 
If anybody is interested I found a dirt cheap dust cover on eBay that happens to fit the Amiga keyboard perfectly, so will be useful for anybody with an A2000/3000 etc too. Here's a photo, should help stop it getting as dusty as it was (and with a bit of luck slow down future discolouration.) I don't think I'm allowed to post eBay links, but will if the mods don't mind (hopefully a £1.50 item won't be considered price driving!)
 

Attachments

  • photo.jpg
    photo.jpg
    191.1 KB · Views: 7
Nice one. You can post eBay links as long as they're Buy it Now :thumbsup:
 
Status
Not open for further replies.
Back
Top Bottom