Amstrad / ZX Spectrum +3 Floppy Drive Hack.

  • Thread starter Thread starter Chinners
  • Start date Start date
  • Replies Replies 97
  • Views Views 107850
ZX Spectrum +2A and 3.5" floppy

ZX Spectrum +2A and 3.5" floppy

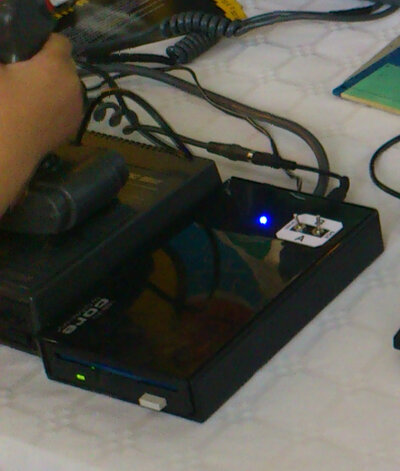
Sorry to post to old thread, but I was unable to solve something... I have successfully built 3.5" enclosure for CPC 6128, and I wanted to do the same for ZX Spectrum +2A, because I have read here that it can be done (can it?). I have a machine that looks like the one on this picture (not mine):

img_2357.jpg


Since it doesn't have a floppy connector as +3, where should I connect floppy cable? Has anyone successfully have connected 3.5 floppy to +2A/B? If yes, could you please tell me how (with pictures, pretty please)?
 
Last edited by a moderator:
ZX +2A

ZX +2A

Did anyone successfully connected 3.5" floppy to ZX +2A? If yes, how did you do it?
 
No, the hack in this thread requires the hardware inside the +3 to use the floppy drive. The +2a does not have the floppy controller hardware built in.

There are other options for the +2a, such as Zetr0's IDE Adapter. This relies on a compact flash card for storage.
 
No, the hack in this thread requires the hardware inside the +3 to use the floppy drive. The +2a does not have the floppy controller hardware built in.

There are other options for the +2a, such as Zetr0's IDE Adapter. This relies on a compact flash card for storage.
Thank you for the answer! I thought it was something like that, but I wasn't sure.
 
Here is mu take on CPC 6128 external floppy. I didn't want to use flat cable, so I found a round one. I soldered both connectors to it (floppy and centronics). Enclosure is old 3.5" USB RACK that powers itself through 12V and has 12V and 5V internally. I made female 12V connector, so that floppy could be connected to CPC monitor's 12V output, and made a cable that connects this 12V back to CPC, so I don't have to use another power supply (although I have one, just in case). On the top there are ABBA switches with labels and blue LED to indicate power on. I had trouble removing black eject button from another floppy (didn't want to break it), so I left biege one here.

Sorry for bad picture...
 

Attachments

  • CPCFloppy.jpg
    CPCFloppy.jpg
    46.1 KB · Views: 21
Cheers for the tip...

I have already made a pin 1 - pin1 34 way cable with no twists...

Pin 1 on the +3 is from the RHS if looking from the front of the Speccy...

I have an older floppy I will try soon.

TC :thumbsup:

What is RHS?

What is pin 1 on back of zx spectrum +3 the one faced the rf output or to the other side ?

:oops:
 
Did anyone successfully connected 3.5" floppy to ZX +2A? If yes, how did you do it?

Well its been done but its a bit involved!

I've done it, but it was a disaster as I couldn't get the Spectrum to see most of the drives I tried, until I connected the one from my Atari STE! I ended up loading a couple of programs to try it, powering the disc drive from the ST (yes really!) then put everything back the way it should be and left it at that. That was 3 years ago. I really must get back to it and build a working solution.

xz1fx.jpg


Edit: Doh! Was thinking about my +3 antics.. Must get some sleep then re-engage brain..
 
Last edited:
Thank you for the info i am getting a little cold ,to do this on my zx spec +3 since they are going kind of hard to get if you know what i mean .


:wooha:
 
Miles Gordon Technology used to make external 3 1/2 inch drives for the +3 which has a power supply built into the case so all you had to do was plug it into the mains and connect the ribbon cable to the +3 and switch it on. I own one and the +3 would only recognise that there was a drive attached if you put a disk into the drive and then switch on the +3. I spent a long time making games run from that drive but I lost a few disks along the way due to the way the +3 needed a disk in the drive at startup to sense there was another drive present.

Chinners method of keeping the drive recognised would have saved a lot of disks from getting corrupted and I am tempted to try his method myself when I get some time.

For all the other Spectrums including the +3 and +2 there is the PLUS D interface and drive, this would take a snapshot of the game you loaded and save it to disk ready to play again when you wanted. It has been a long time since I used my PLUS D but its something I will probably get back to at some stage.

The +3 was my first Spectrum and I had loads of fun with it, many hours spent typing in code from magazines and then saving and running the code or programs, it was amazing what you could do with it but along came the Amiga and the Spectrum got put aside for a while.
 
Last edited:
Will ANY HD PC drive work on a CPC 6128 using this method? I read you needed a DD Drive, not HD. But there's a lot of Sony-MPF920 on eBay I can nab if this works with HD drives.

I also have two spare Amiga floppy drives, but I assume these won't work. Am I right?

Im planning to connect it internally, I suppose same method works. Also that I can remove the internal 3" drive without problems using this method.
Wasn't the +12V header backwards inside, therefore I have to invert it?

What about tehse floppy emulators? http://www.ebay.co.uk/itm/3-5-1-44M...-0-Black-color-3-digits-Version-/231004353057
 
Last edited:
But it seems in this post none of the modifications applied in the link you give are made, just some buttons added. No cut traces, no resistor swapping, nothing.
 
But it seems in this post none of the modifications applied in the link you give are made, just some buttons added. No cut traces, no resistor swapping, nothing.
Well, then just don't do additional steps. I have several Sony drives already converted for Amiga use, and I just used one of those. You can probably use non-converted one without problems (maybe try conversion steps later if it doesn't work).
 
Will ANY HD PC drive work on a CPC 6128 using this method? I read you needed a DD Drive, not HD. But there's a lot of Sony-MPF920 on eBay I can nab if this works with HD drives.

I also have two spare Amiga floppy drives, but I assume these won't work. Am I right?

Im planning to connect it internally, I suppose same method works. Also that I can remove the internal 3" drive without problems using this method.
Wasn't the +12V header backwards inside, therefore I have to invert it?

What about tehse floppy emulators? http://www.ebay.co.uk/itm/3-5-1-44M...-0-Black-color-3-digits-Version-/231004353057

Any PC Floppy drive will work, but some ar easier to modify (Ready signal etc) than others. The MPF920 is one of the more difficult ones to modify.

Regarding internal installation: Yes, the power connector on the CPC has 5V and 12V swapped, you'll need to swap these or you'll fry the drive. The CPC also uses a 26way header for the 3in drive, so you'll need to make one of these adapters too: http://www.cpcwiki.eu/index.php/DIY..._Cable_for_Internal_Floppies_.2F_HxC_emulator

Bryce.
 
Any PC Floppy drive will work, but some ar easier to modify (Ready signal etc) than others. The MPF920 is one of the more difficult ones to modify.

Thanks for your info Bryce!
What about a drive taken out of an Amiga?
I have one I took from an external drive and although a bit noisy it works fine.
Would it work straight away with no modifications?
 
Amiga drives have the DC/RY signals and id set the same way as they are in Amiga so it should work as A: drive straight up.
 
OK I need some floppies now to test this.
But then I'll have to figure out how to transfer a disk to the Amstrad.
The plot thickens :P
 
Back
Top Bottom